We shared our v2 CI/CD blueprints for Azure Pipelines as open source, which include our generic templates that we created as a temporary solution to replace the classic Azure Build Pipelines for continuous integration (CI). They are helpful to begin with YAML-based build pipelines and link them with classic Azure Release Pipelines, but not our preferred approach. We will explain more about that later.
v1 versus v2 generic template
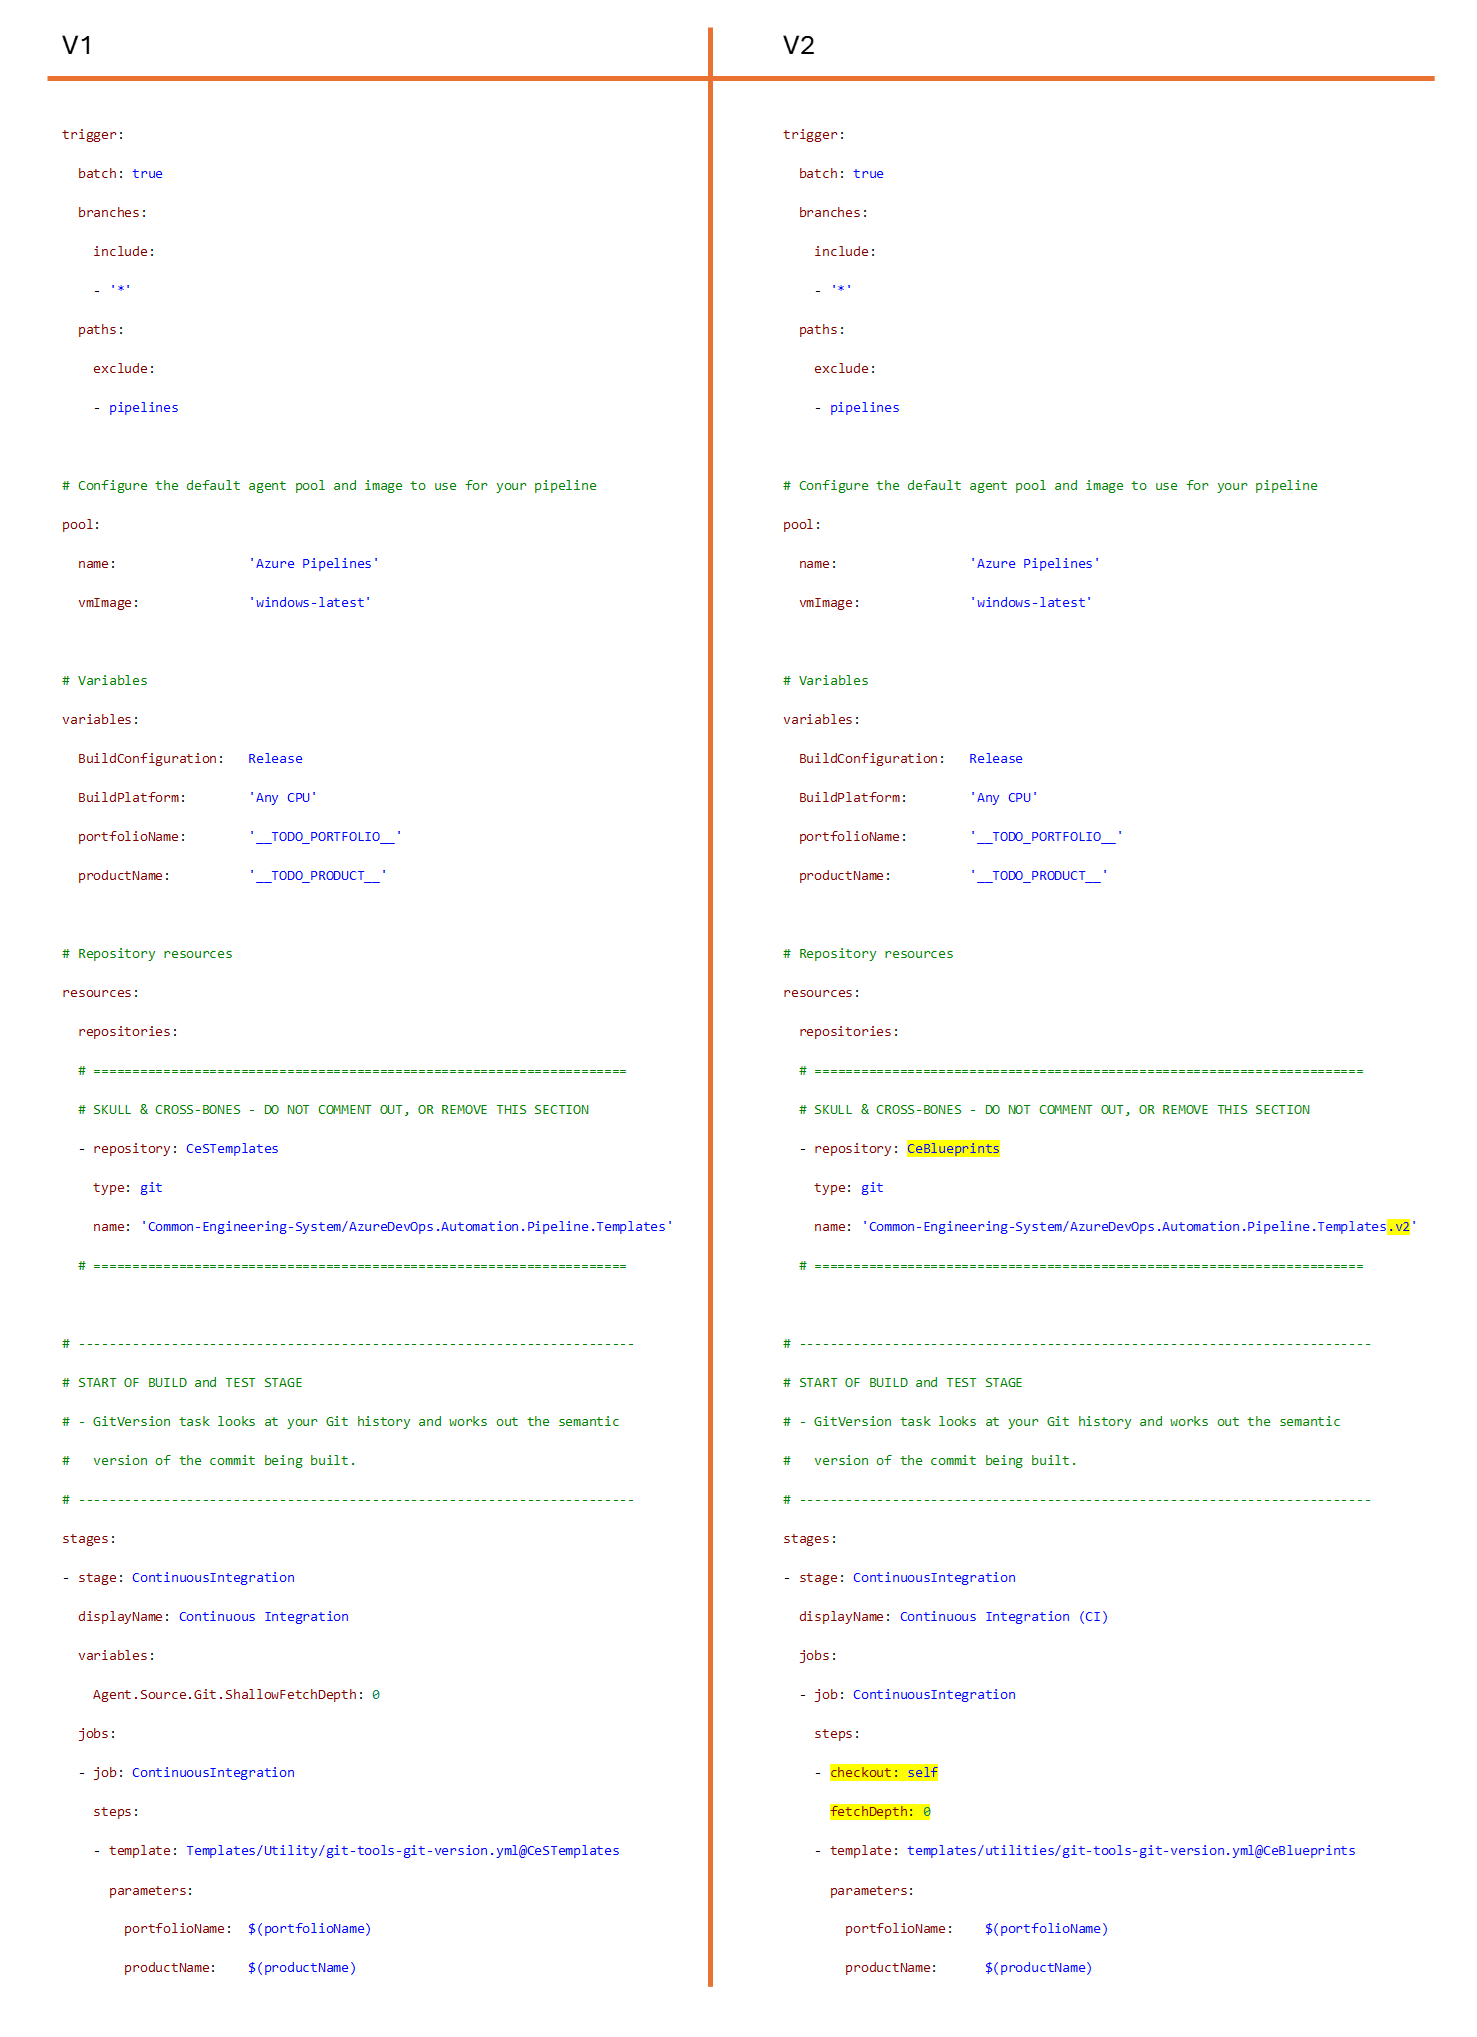
First, let us answer our engineer's question of how to migrate from our v1 generic templates to the v2 versions. The image below compares v1 with v2, as at 2024-02-22. The only differences (all highlighted in yellow) are minor cleanups and:
- Repository reference name (@CeBlueprints) and repository name (*.v2) reference the repository with the v2 templates and blueprints, aka v2 CI/CD blueprints.
- The v2 template uses the checkout: self, before calling the git-tools-git-version.yml template. Checkout Two ways to share your toolbox with your pipelines and Checkout your git repos at the right time! for an explanation of why we moved to using checkout.
Make the right choice!
Before you proceed with the migration, you need to determine WHY you should be using the generic template. Here is a simple checklist to help you with the decision:
- Is there a v2 CI/CD blueprint for your application type? If yes, use the v2 CI/CD blueprint. We are phasing out the classic Azure Pipelines and so should you.
- Else, Do you have to use a Classic Azure Release Pipeline? If yes, use the single-job v2 generic template for your CI/Build pipeline.
- Do you need the multi-job v2 generic template? NO, we strongly recommend keeping it simple and only using the single-job v2 generic template. You should only use the multi-job template in rare situations and try to avoid it as it makes things more complicated and can put pressure on your Azure DevOps agents. See Part 5: Pipelines - Blueprints to fuel consistency and enablement for an explanation of the two types of generic templates.
OK back to: How to migrate from v1 to v2 generic build-only template?
Migrate v1 --> v2, option 1 – move your pipeline to v2 (recommended)
- Create a new pipeline, using the single-job v2 generic template.
- Look for TODO placeholders and migrate (copy-paste) the code from your v1 to your new v2-based Azure Pipeline.
- Reconnect your classic Azure Release Pipeline to the new v2-based Azure Pipeline.
- Validate the new pipeline.
- Deprecate (delete) your old v1-based pipeline.
Simple!
Migrate v1 --> v2, option 2 – upgrade your v1 pipeline
Using the comparison between v1 and v2 as per image above, update your v1 pipeline and upgrade it to the v2 pipeline format, following these basic steps:
- Update template repo name from CeSTemplates to CeBlueprints.
- Update template repo name, by appending .v2.
- Remove variables section and add checkout logic under at the beginning of the stage definition.
- Rename /Templates/ to templates/.
- Use either dotnet or other for applicationType.
- Validate the updated pipeline.
Hope our internal "how to" discussions are interesting and add value to the open source v2 CI/CD blueprints.